Homemade SAP B1 Web Client – Customer Service Portal

Introduction

Last year, I bought a brand new iPhone XS in Melbourne just before going on a road-trip on the Australian east-coast with my friends. Everything went pretty well until a black dot started appearing in the upper right corner of my shots.

Palm Beach, NSW (and a dot)

As we arrived in Brisbane, it only took a few minutes to book a time slot with a genius at the Apple Store and no more than a few hours to get the camera fixed. The whole thing cost me exactly 0$.

We can say that my experience with Apple’s customer service was pretty statisfying and stress-free.

Since I was looking for a new module to develop on my app, I thought about this again and it gave me the idea to build a customer service portal, so here is what we will be talking about in this article:

I simply attached this web « module » to the B1 client I am working on (and that you can read about in the first two articles)

SAP B1 and the service module

SAP B1 has its own service module. From my experience, it isn’t widely used but it does offer several business objects that you can use to handle some basic customer service processes:

  • Equipment Cards
    • Used to associate an Item (with a Serial Number) to a Customer
    • Can be automatically generated when an item is sold to a customer
  • Service Calls
    • Used to describe any problem encountered with an item (you can see it as a ticket)
  • Service Contract
    • Used to define coverage hours, items included in the contract etc…
    • Can cover one or several equipment cards
Indeed, there are plenty of other options and features you can use and there is always the possibility to add custom logic through User-Fields or User-Objects, but for this small application, we will stick to the plain vanilla SAP B1 Service module and build something simple.
B1 service module can be overwhemling at first

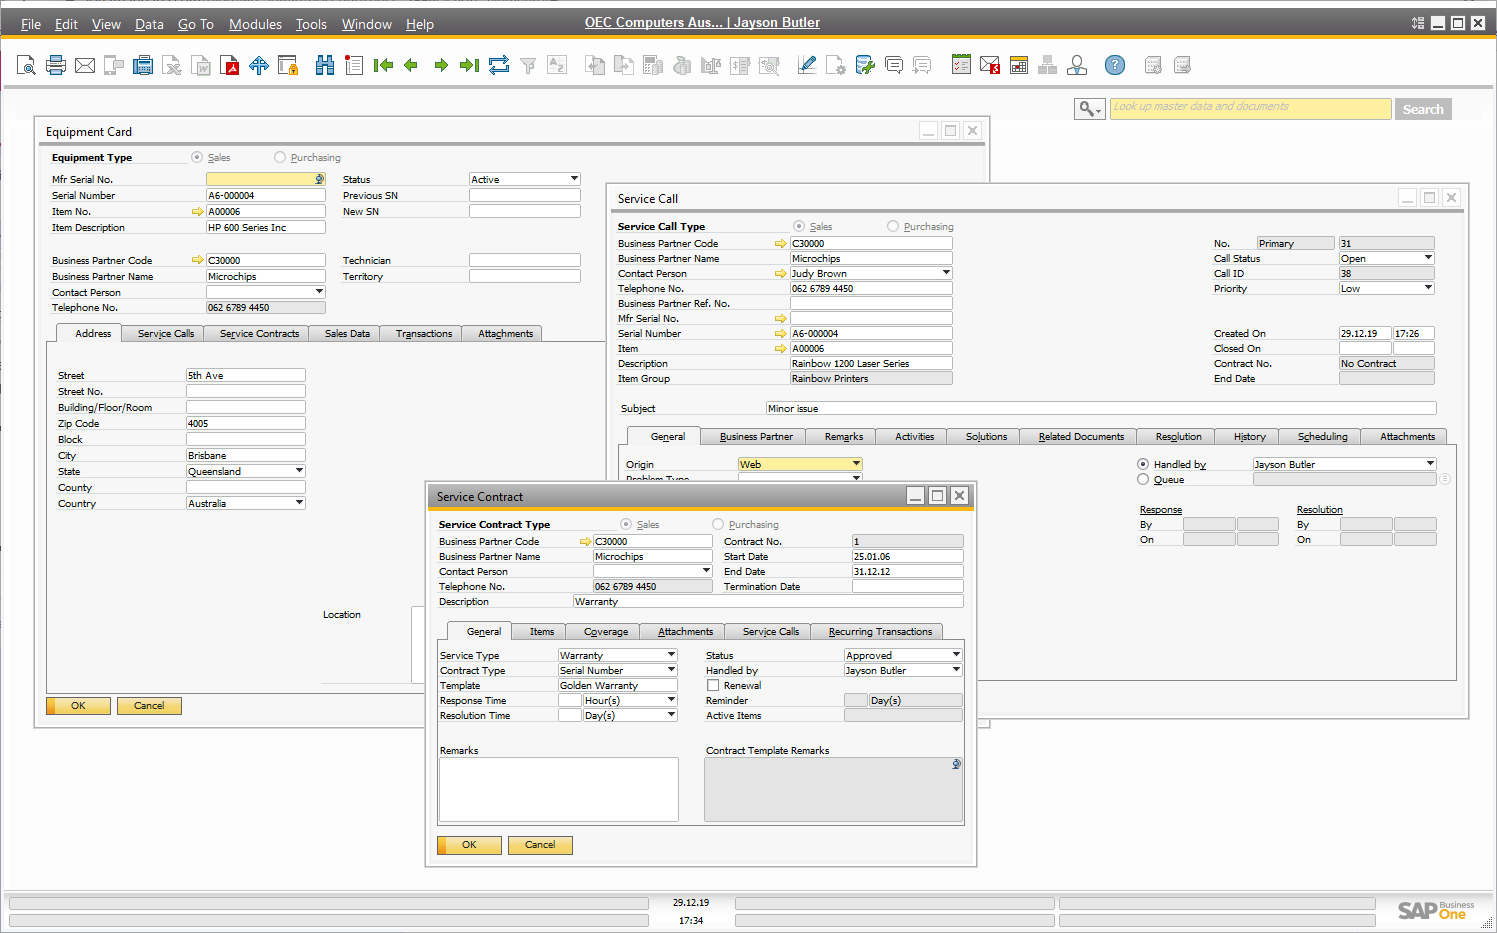
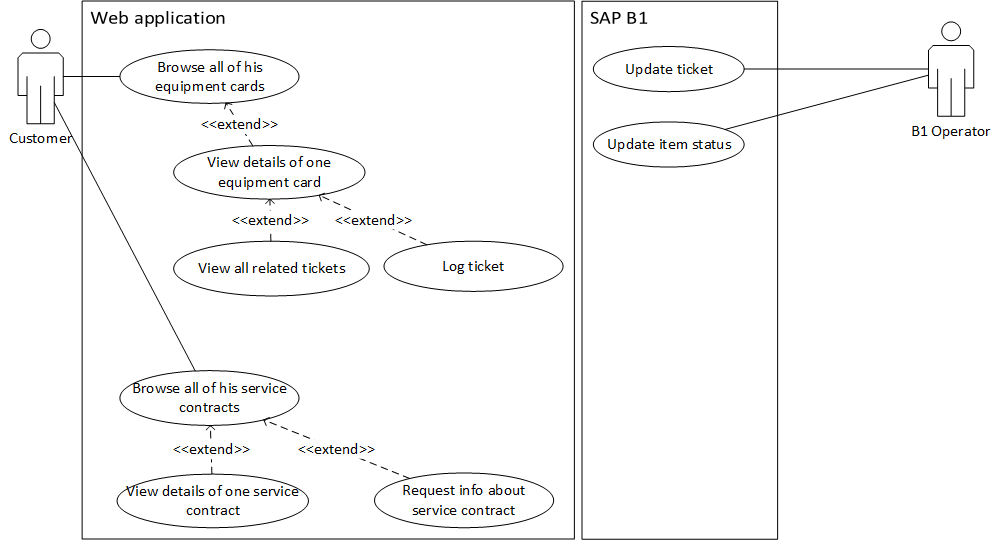
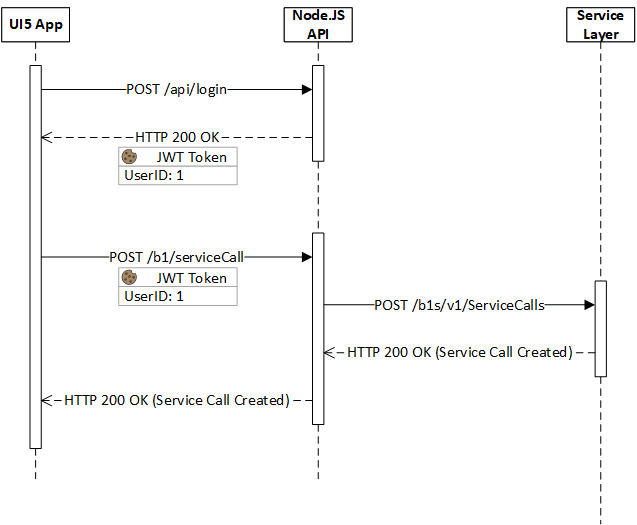
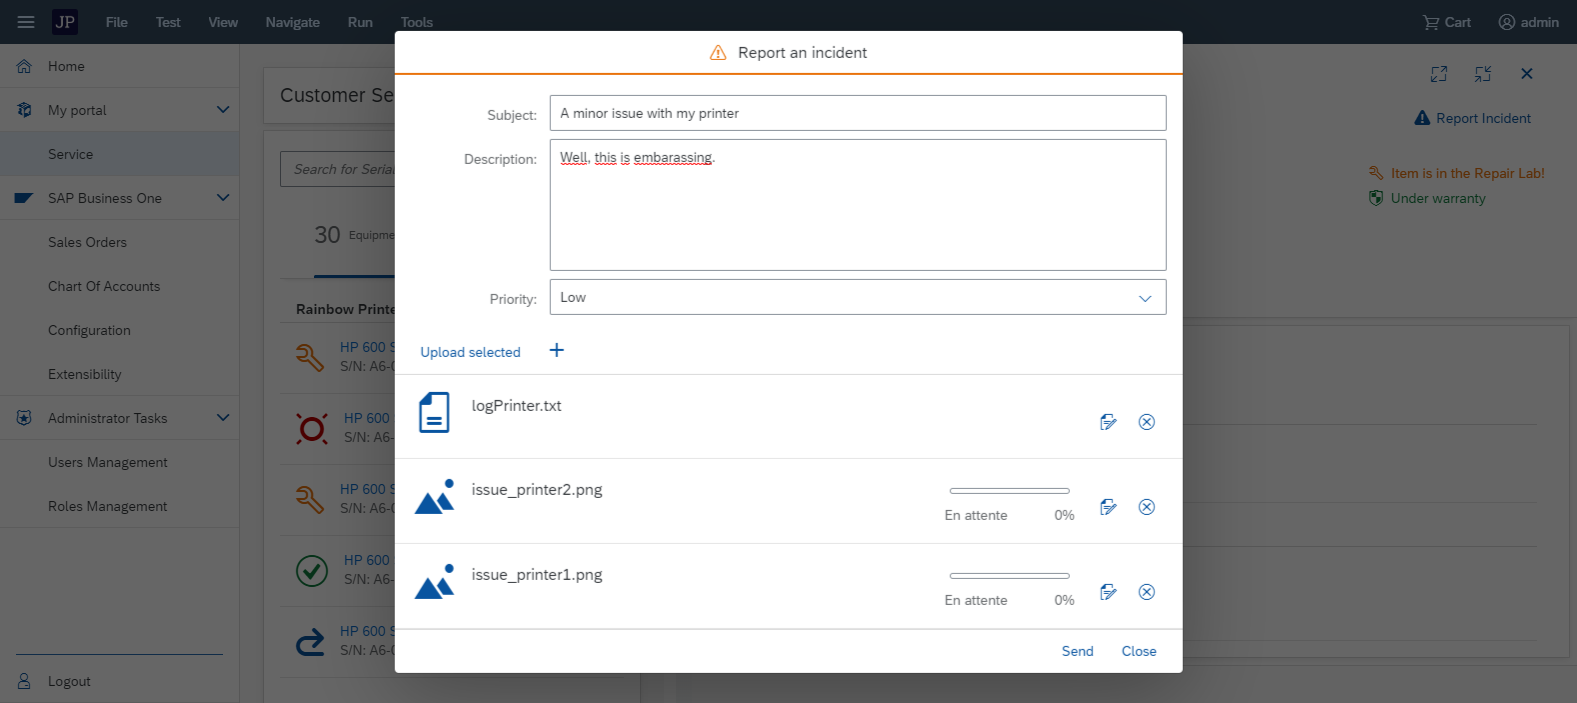
Now, let’s imagine that you sell items to your customers and that you would want to make it easy for them to report an issue with one of them. One of the thing you could do is create a web portal for your customers with some basic actions over their equipments.

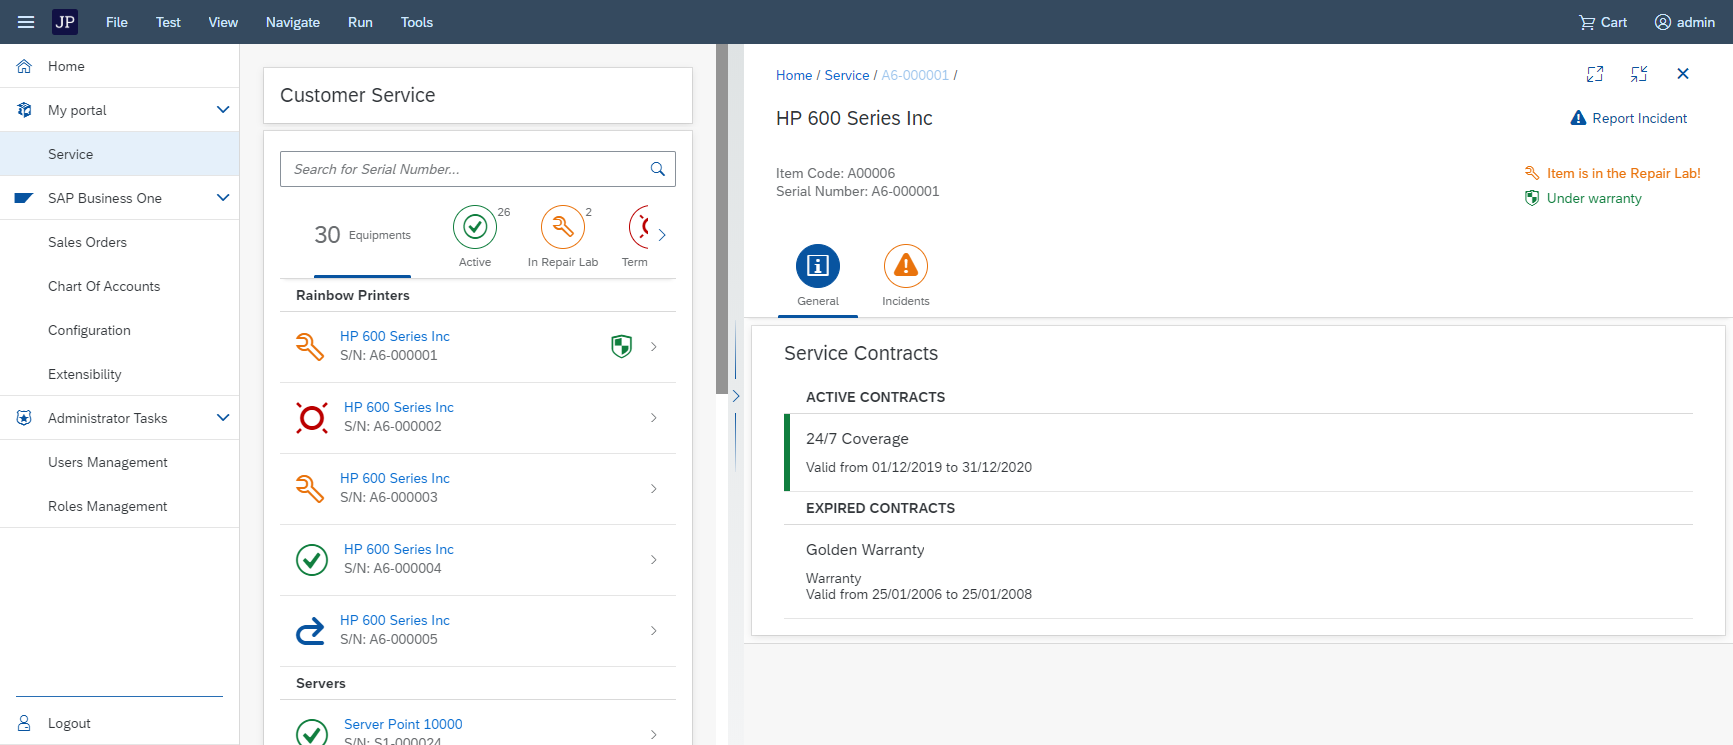
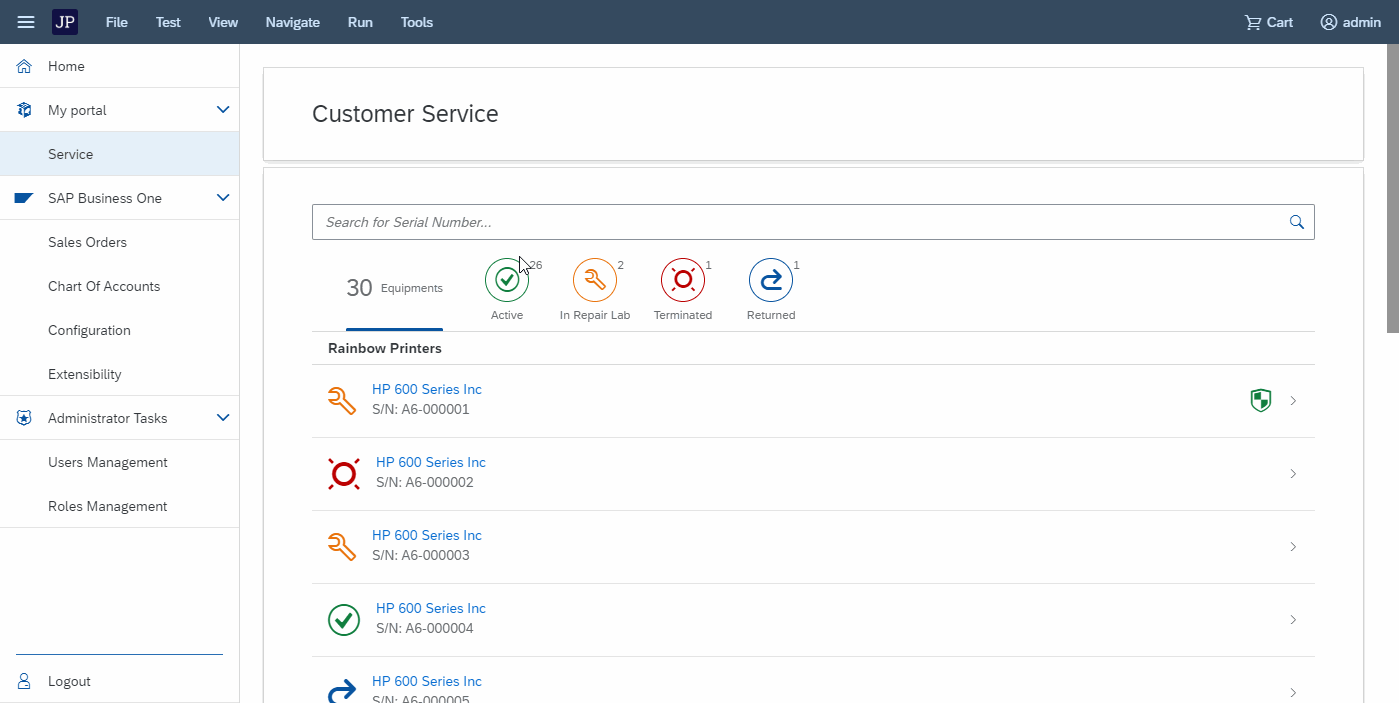
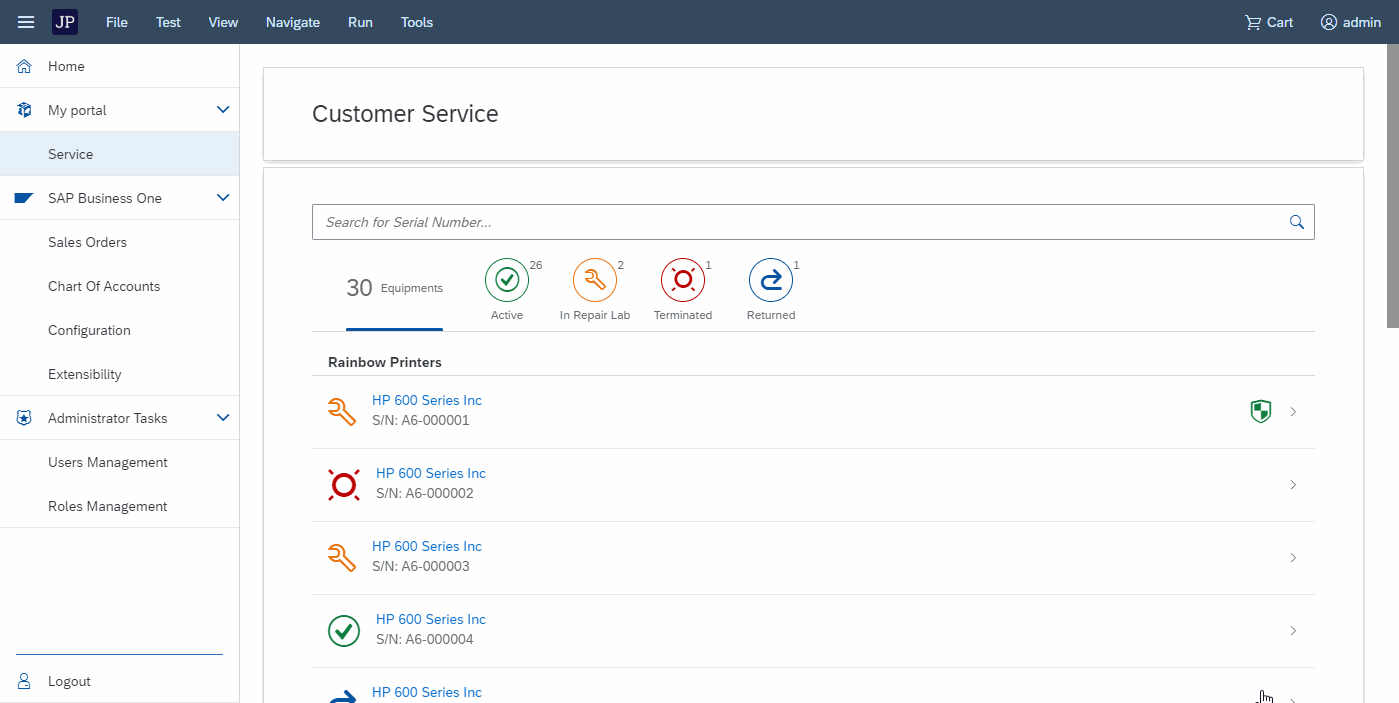
A simple and easily-readable interface can be beneficial for both external and internal purposes. This illustrates with something as simple as active filtering.

In the image below, we can see all of the equipment cards for one specific Business Partner, grouped by their standard SAP B1 state: active, in repair lab, terminated or returned (to the supplier).  Additionally, we can filter the equipments by their serial numbers.


Browsing the equipment cards based on their status

App features

As I simply wanted to demonstrate how easy it would be to create such an interface with SAP B1, I stuck to basic features.

Use-Case Diagram of the service web application

One of the key feature of the app is the possibility to create a ticket (which is sent to SAP B1) for a given equipment.

Creating a ticket is nothing more than creating a Service Call for a given:

  1. Item
  2. Serial number
  3. Customer
Additionally, the user can also attach one or several files to the ticket.
 
Below is a simple animated gif that demonstrates the creation of a ticket for an equipment with the serial number « A6-00004 ». The user can then open it by going into the Incidents tab.

This translates to the creation of a service call in SAP B1

Technically speaking

Technically, creating a service call is nothing more than an HTTP call to the Service Layer. The call is not made directly via the UI5 application (which is on the client side) but is done via our node.JS API. 

The following sequence diagram shows us the interactions between the three main components of our app:

Sequence diagram showing the creation of a B1 service call

Listed by arrow numbers (from top to bottom):

  1. The user logs in by sending a POST request to the api/login endpoint. The user provides a username and a password in the payload.
  2. If the authentification is successful, an HTTP 200 response is sent back to the user along with a JSON Web Token containing his UserID.
  3. Now in possession of a JWT, the user can make subsequent requests to the API. He can create a new service call by sending a POST request to the /b1/serviceCall endpoint.
    • The Node.JS API (which is on the server-side) is acting as a middleware between the service layer and the UI5 app (which is on the client-side).
    • It can hold additional controls, checks and business logic before sending a request to the service layer.
  4. The Node.JS API sends a POST request to the B1 service layer to create the service call.
  5. The Service Layer creates the B1 Service Call and returns an HTTP 200 response along with the service call object as a JSON (basically, in its B1 form).
    • Same thing applies here as in point 3: the Node.JS API acts as a middleware and can apply additional transformations to the payload returned by the service layer such as removing certain information or adding others.
  6. The final payload is returned to the UI5 App which can interpret it in the UI.

How could this be improved?

Of course, this is only a glimpse of the things you can do with a plain vanilla B1 service module and with a simple UI5 interface. One may improve it by:

  • Creating several alerts in SAP B1 to notify the relevant support technicians that new tickets were submitted.
  • Monitoring part expiry dates or warranty expiry dates to automatically send emails to the customer.
  • Notifying customers when an update is available for their product, offering them the possibility to book a time slot to upgrade it if a manual intervention from the supplier is needed. Of course, this wouldn’t be in the interface itself but can be part of a bigger project.

Yup, lots of things could be done. This is just a glimpse of what you can achieve with something as simple as a web application.

Then, and this stands for every SAP B1 project, it all depends on what the customer needs and what kind of business rules he wants to see in the application.

Thank you for reading! 🤙🏼

Retour en haut